-
 12
12AUG, 12
-
Why Your Tile Flooring Will Fail and How to Ensure Success
Failure. It’s going to happen. But you don’t want it to happen when constructing your home. This DIY post comes from one of our own experiences with tile failure. Cracked, pulling up and anything else you can think of – if it could’ve gone wrong, it went wrong. We don’t want this to happen to you.Follow Directions
The most important step to avoiding tile failure in any way is to follow all manufacturer directions. Like baking a cake, you wouldn’t skimp on flour or baking soda, so don’t skimp on any steps when it comes to mixing thin set mortar. Read and follow all the directions for your thin set and always use the proper trowel. Be mindful of the thin set needed for the type of subfloor and tile you are laying. Surfaces such as gypsum take a different thin set than OSB, for example. Following these guidelines alone can protect you from cracking tiles in the future.
Preparing the Subfloor
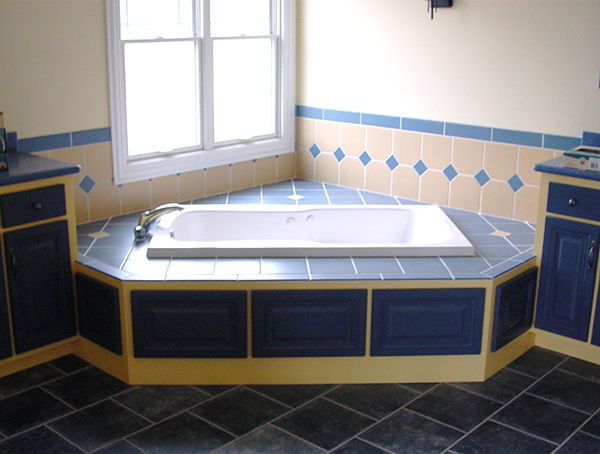
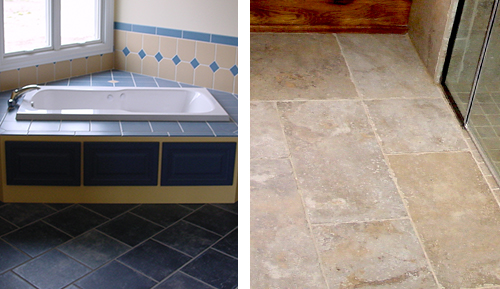
The tub decking is made entirely of tile. With wet surfaces, it's crucial for tile to have a waterproofing layer over the subfloor as well as to use proper tile laying practices. Image Source: Upscale Remodeling Before you start spreading thin set, remember to wet your subfloor (substrate) if using plywood or OSB so moisture from the thin set isn’t absorbed by the subfloor. The thin set will dry out if this happens. If your subfloor is a different material, like concrete, be sure it is clean of dust and debris before coating it with thin set. Thin set mortar will not adhere properly to dirty floors.
Keep it 100
Thin set mortar creates bonding and support of the tile to the subfloor. The industry standard for mortar coverage on tile is 80%. On exterior or wet areas, coverage jumps to 95%. It’s always recommended to shoot for 100% coverage. This will prevent damage to the tile including cracking and pulling up from the subfloor.
Tile Warp is Real
Tile manufacturers are allowed a certain tolerance for unevenness in their product. From tile to tile, there will be slight differences in curving of the tile. Therefore, back buttering each large format tile (coating the back of the tile with mortar using the flat side of the trowel) is critical. It will even out gaps created by the tile curvature.
Back Buttering Large Format Tiles is Essential
Tiles may also have an uneven back. Filling in those gaps with thin set will further ensure the necessary 85% mortar coverage. Even if you have a smooth back, porous stone will soak in wet thin set. Back buttering satiates the surface, creating a stronger bond once its laid on the subfloor. Tile may also have excess kiln release or dust on the back. Placing an un-back buttered tile directly down may be cause for bond breaking if laid directly on the mortared subfloor.
The large format tiles here are back buttered to ensure consistent bonding and to keep the tiles level with each other.Image Source: Upscale Remodeling Tile Placement
Once your thin set is down and combed with parallel ridges, place the tile perpendicular to the ridges and move it back and forth to collapse them. Again, this creates more coverage on the backside of your tile to give you better bonding power. Periodically pull a tile up it to check your coverage. If you’re doing all the right moves and still not seeing enough coverage, go a size up in your trowel.
Combing the Thin Set Mortar
Keep your lines straight while you’re combing the mortar. It might be easy to swirl or mix your stroke, but this will cause more damage. Creating swirls or mixed strokes don’t allow for full coverage on the back of the tile. Air pockets develop and leave open spaces underneath the tile, weakening it. When something falls or it experiences heavy traffic, the tile will crack. Straight lines create the highest amount of coverage, leaving no gaps or weak areas. Keep the trowel at a 45-degree angle as you’re combing to create even height ridges.
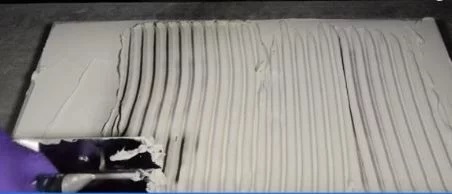
The large format tiles here are back buttered to ensure consistent bonding and to keep the tiles level with each other. Image Source: Ceramic Tile Foundation (Trowel Notch) Size Matters
Speaking of trowels, the proper notch size matters. Choosing too small of a notch size for larger tile will result in less than 80% mortar coverage on your tile. For instance, a 1/4” x 3/8” trowel would suit an 18” x 18” tile rather than 1/4” x 1/4” trowel. The ridges created by the smaller notched trowel do not make wide enough ridges to correctly coat the tile. There is no standard pairing for trowel to tile, although the NTCA does list guidelines. Follow manufacturer’s recommendations if you’re unsure of where to start. Remember to check tiles every once in awhile to ensure your tiles are receiving 80% mortar coverage.
The Future is Your Friend
Investing in the latest flooring technology will also help safeguard you against failure. Placing an uncoupling membrane between the subfloor and tile will allow them to move independently of each other. This removes the risk of cracking due to movement between the subfloor and tile. Placing tile directly on the subfloor without an uncoupling method will put your tile floor at a greater risk of failure.
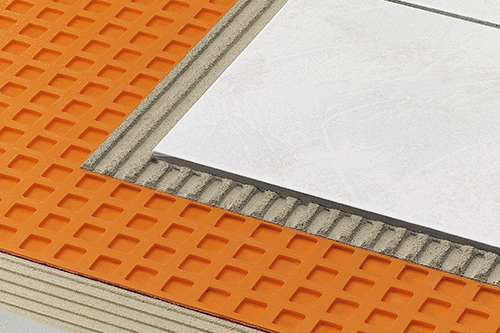
The uncoupling membrane separates the tile from the subfloor, allowing movement in the subfloor without cracking the tile layer. Image Source: Schluter Systems At Upscale, we use Schluter Ditra for our ceramic and stone tile installations. It’s a waterproofing and uncoupling membrane that mimics the centuries-old idea of using sand to uncouple the subfloor and tile layers. Ditra not only protects the tile from subfloor movement, but it also protects sensitive subfloor from water that may seep down through the grout. The membrane creates a barrier from residual vapor seeping into the tile layer as well. Because it’s uncoupled, the whole system will remain intact as it experiences traffic.
Crack, Snapple…Broken
Another common issue with tile cracking is when hardwood rubs against the tile flooring. The flexible wood against the rigid tile causes strain. To troubleshoot cracking, place a floor profile between the two. Especially for uneven surfaces, this will make the surface transition smooth.
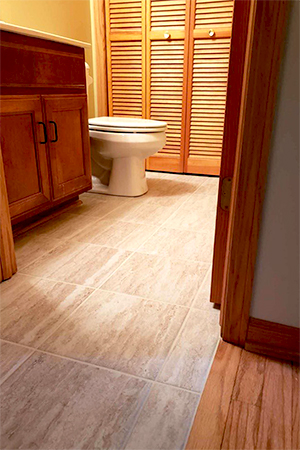
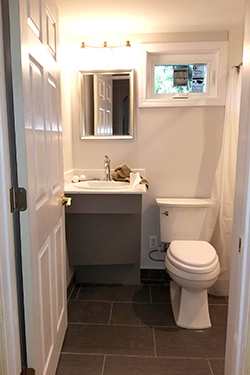
Including a profile between hardwood floors and tile is highly recommended. The flexibility of the hardwood versus the rigidity of the tile is no match for the tile. Image Source: Upscale Remodeling Professional Advice
Installing tile floor is a big project. If you’re unsure or new to tiling floor, it may be wise to call a professional to help. Tile failure can cost you more than just time. Redoing an entire floor because of cracked, uneven or lifting tile will run you twice as much (or more) to what you originally paid for the installation. If you’re a professional reading this, keep these tips in mind on your next job. They’ll save you from angry client calls and extra work.
Latest Posts
-
 Labor Shortage: Lack of Skilled Laborers a Problem
Sep 18, 2019


